MailChimp is one of the most popular email marketing services in the world, with over 10 million people & businesses using its platform. One of the things I love about MailChimp is their laid back approach. They use very informal language (“Sup, Dave.”), link to funny YouTube videos after you schedule an email, etc.
While the MailChimp account setup process is pretty straight forward (and almost fun), it’s goal is to get you up-and-running as quickly & easily as possible. Therefore, some things, like creating your first list in MailChimp, might not be super-easy to figure out.
About MailChimp Lists
There are some important things you should know about MailChimp lists before you create your first one.
- Lists are where you store your subscriber’s information. Think of a list like a spreadsheet. Each row is a new subscriber. Each column is a piece of information about that subscriber.
- Every MailChimp list has a signup form to go along with it
- Each list you create is its own entity. Subscribers, data, reports, etc. cannot be shared between lists.
- The same email address on 2 separate lists will count as 2 subscribers (when calculating your monthly price plan)
- Every subscriber you add to a MailChimp list must give you express permission to send to them. We (and MailChimp) highly recommend a double opt-in process for acquiring new subscribers.
- Maintain your list(s). Try to re-engage inactive subscribers (those who never open emails), and if necessary, prune your list so that they don’t count towards your billable subscriber count.
- Do not create multiple lists to segment your subscribers and send emails to people with specific preferences. For that, use MailChimp groups.
How to Create Your First List in MailChimp
Let’s walk through the process of creating your first list, and get you ready to start collecting email addresses and send out your first campaign.
1Navigate to “Lists” in the MailChimp Dashboard
MailChimp’s dashboard contains all of your subscriber information, your email campaign templates, reports, automation tasks, and more. First, let’s go to the “Lists” area where you manage your subscribers.
- Click on “Lists” in the top navigation bar
- In the top-right corner, click “Create List”
2Create Your List in MailChimp
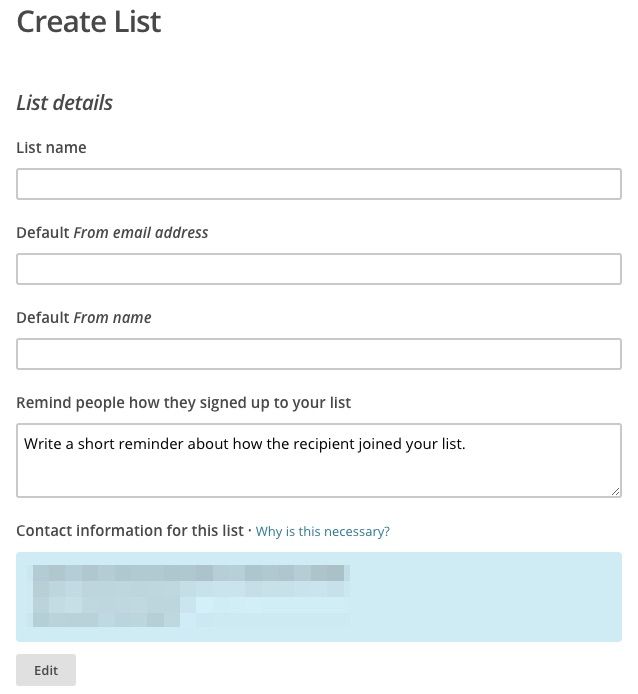
Let’s walk through each form field:
List Name
This is a relevant title for what your email list is all about. Your subscribers will see your list name on signup forms, as well as subscription confirmation emails. Your list name should be obvious and professional.
Ex: “WP Smackdown Newsletter,” “Mary’s Flower Shop,” “Mission BBQ News & Events”
Default From email address
When you send emails, this will be the email address that it comes from. It should be something easily recognizable, @yourdomain.com, and able to accept replies. You can change this on a per-campaign basis, but I recommend using the same email for all campaigns that you send out.
Ex: [email protected], [email protected]
Default From name
Very similar to the above, this will show up in the subscriber’s inbox next to the from email address. Your company name or the name of your newsletter are two good options.
Ex: “WP Smackdown,” “Mary’s Flower Shop,” “Mission BBQ”
Remind people how they signed up to your list
This will be displayed in the footer of your emails to provide context as to why your subscribers are receiving email from you. Be succinct, but specific.
Ex: “You are receiving this email because you signed up on our website.”
Contact information for this list
This is pulled from your main account details, but you can change it if you have multiple lists with different company names/addresses. For most people, just leave this untouched.
Click the “Save” button once you’re finished entering all the information.
Subscribe Notifications
You have the option to receive email notifications when users subscribe and unsubscribe from your MailChimp list. You can receive a daily summary of subscription activity, or get an email for each and every new subscriber who joins your list. This is completely optional and depends on your preference.
3Customize Your Signup Form (optional)
As soon as you create your first list in MailChimp, a signup form is created for you. By default, it will ask for:
- Email Address
- First Name
- Last Name
Depending on the type of email list, you might want to collect additional information. Maybe you even want to remove first & last name, and only collect email address. To do this, you’ll need to edit the fields on your list’s signup form.
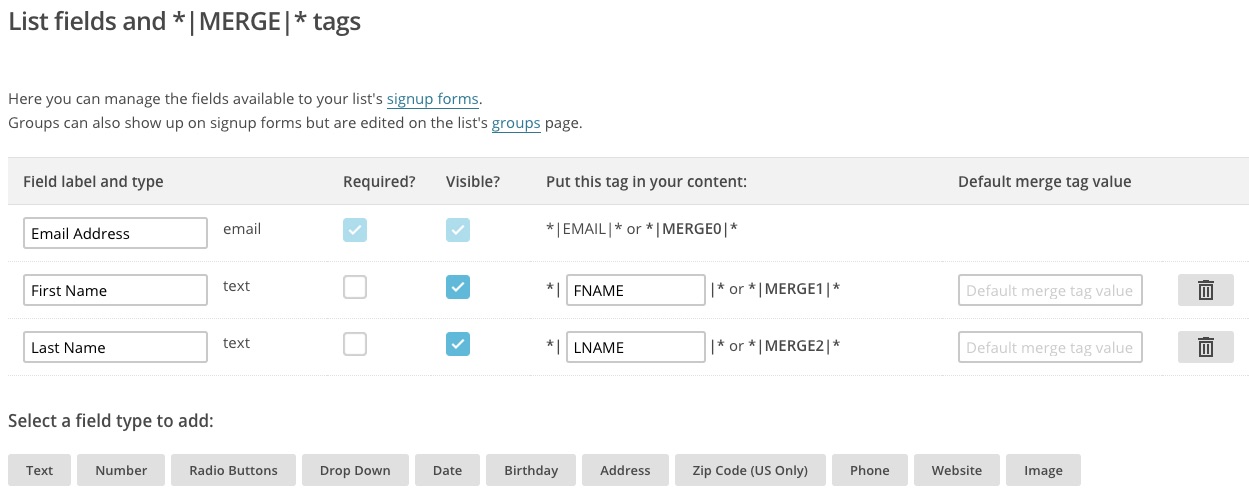
Collect Additional Information
- Navigate to “Lists” in the top navigation
- Click on the list you just created (or the one you want to collect more data for)
- Then go to Settings > List fields and *|MERGE|* tags
This is where you add additional collection fields to your signup form. We’ll have a more in-depth tutorial coming soon.
Style Your Signup Form
- Again, go to “Lists” and click on the list you’ll be editing the form for
- Click on “General forms”
- Under the Build It tab, you can add or remove fields that you edited in the previous step
- The Design It tab lets you customize the design of the signup form for that particular list
This is also the place where you can grab your signup form URL. This page is hosted by MailChimp, and it contains the very form you are designing right now. This is how subscribers will be added to your MailChimp list.
A more detailed tutorial is coming soon on how to design the ultimate MailChimp signup form.
4Import Subscribers (optional)
The last thing you might want to do is import subscribers from an existing list you have. Remember though, you need to have their explicit permission to send them emails, so make sure everyone voluntarily opted in.
- Again, go to “Lists” and click on the list you’ll be editing the form for
- Go to Add subscribers > Import subscribers
You can upload a .csv or .txt file, copy & paste contacts from an .xls file or spreadsheet, or use one of MailChimp’s many integrated services, like Google Drive, Salesforce, Eventbrite, Zoho and more.
A more detailed tutorial on importing subscribers into MailChimp is in the works.

5Next Up: Automatically Send WordPress Posts via MailChimp
Now that you’ve got your list all set up, it’s time to start sending emails. Our friends at Barn2 Media wrote a nice piece on sending WordPress blog posts with MailChimp automatically, using MailChimp’s RSS automation feature.
What are you waiting for? Signup for MailChimp today »
That should be everything you need to know about how to create a list in MailChimp. We’ll link out to the more specific tutorials soon, but this should be enough to get you started collecting email addresses.
You can also reference MailChimp’s documentation for more information about MailChimp lists.
We Recommend
https://kinsta.com › wordpress-hosting
Fast and secure infrastructure, worldwide CDN, edge caching, 35 data centers, and enterprise-level features included in all plans. Free site migrations.
https://gravityforms.com › features
Create custom web forms to capture leads, collect payments, automate your workflows, and build your business online. All without ever leaving WordPress.
Leave a Comment