If you’re not using Google Analytics on your WordPress website… what are you waiting for?! All joking aside, you should probably get on that. It’s an incredibly valuable tool, and it’s 100% free.
In a previous article, we explained the 3 best options for how to add Google Analytics to WordPress. If you chose the Google Tag Manager option, this article is for you. If you’re looking for a better way to manage tracking scripts & collect Google Analytics data, but have never heard of Tag Manager, learn how to install Google Tag Manager first.
For full written instructions with screenshots, continue below the video.
Add Google Analytics with Tag Manager
I’ll assume you already have Tag Manager setup on your site. Remember, the code should be placed immediately after the opening <body> tag. Once you login to Tag Manager…
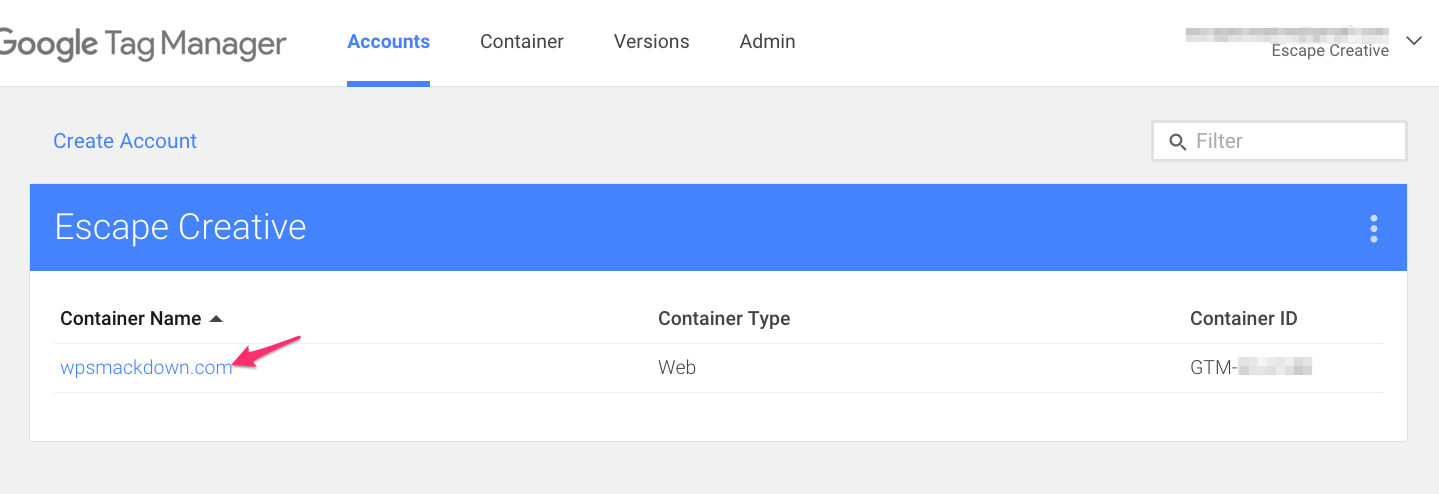
1. Choose Your Container
2. Create a New Tag
- Click “Create a new tag”
- Give your tag a name
- This is used for internal purposes only, so name it anything you’d like

3. Configure Settings

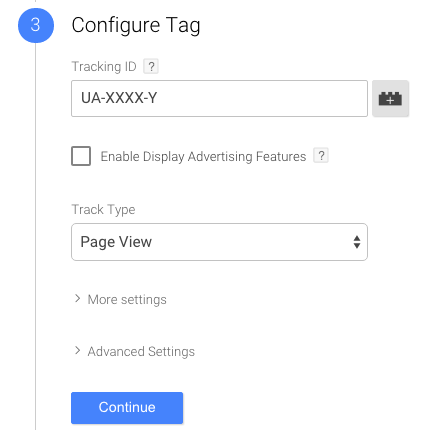

- Choose Product – Google Analytics
- Choose Tag Type – Universal Analytics
- Configure Tag
- Tracking ID – insert your Google Analytics tracking ID here
- Track Type – leave this set to “Page View”
- Fire On – All Pages
Once all those are set, click “Create Tag.”

4. Preview the Tag
Before we publish the Google Analytics tag, Tag Manager lets us preview it to make sure it’s setup properly.
- Click the dropdown arrow next to “Publish,” and choose “Preview”

- In the same browser that you’re currently in, open up your website in a new tab
- Look for the Google Tag Manager preview pane at the bottom
- Your tag should appear under Tags Fired On This Page
![]()
5. Publish the Tag
- Go back to Google Tag Manager
- Click the “Publish” button
- Click “Publish Now”
6. Verify Data in Google Analytics
Just to be on the safe side, you should login to your Google Analytics account and make sure data is being recorded. It can take a few hours for the data to reach your account, but if you check the next day, you should see some pageviews in there.
And that’s how you add Google Analytics with Tag Manager. Pretty straight forward, right?
If you have any questions or challenges getting this setup, please let me know in the comments and I’ll try to help.
We Recommend
https://kinsta.com › wordpress-hosting
Fast and secure infrastructure, worldwide CDN, edge caching, 35 data centers, and enterprise-level features included in all plans. Free site migrations.
https://gravityforms.com › features
Create custom web forms to capture leads, collect payments, automate your workflows, and build your business online. All without ever leaving WordPress.
Leave a Comment